

A collection of handmade hoops and a plastic commercial hoop.
Homemade hoop being wrapped with cotton twine.
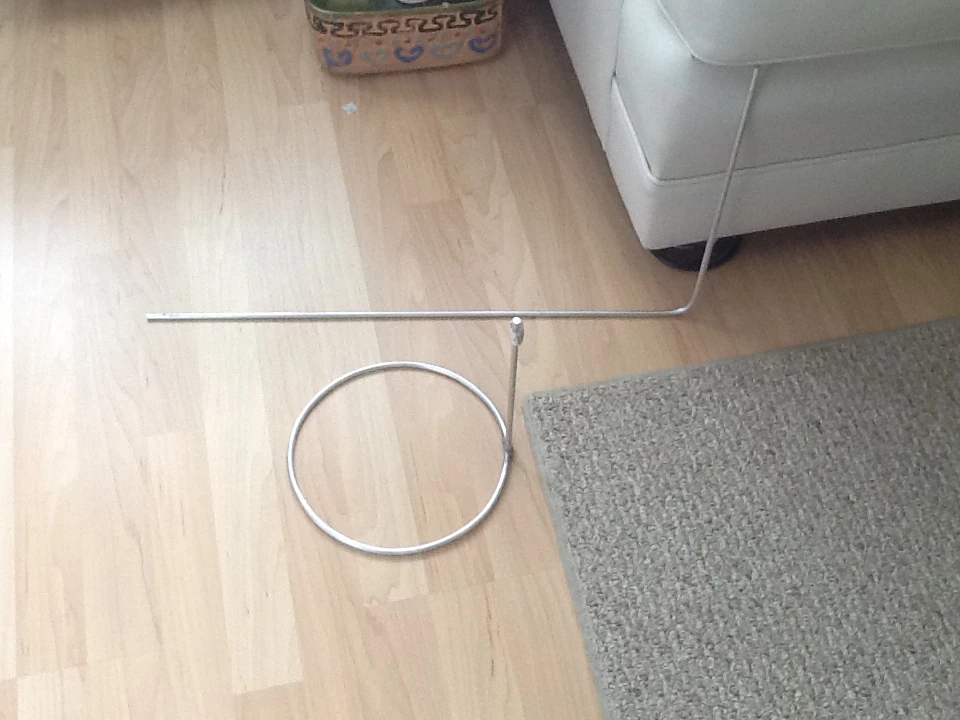
Rigid hoops are great fun. It is easy to make your own using coat hangers or aluminum rod. This page is in progress. Hopefully, while we look for the time to expand it you will find this information useful.
See also: PEX Hoops.
Materials[]
You can use a variety of materials to make them. Plastic-coated coat hangers work well, are inexpensive to make and can last years. Aluminum rod is easy to work with and can be bent into a nice hoop without special tools. Some people use brass rod and build simple 'jigs' to facilitate bending them. Aluminum craft wire or heavy baling wire can be used for small hoops if you don't abuse them too much.
Most people find that wrapping these hoops with twine or yarn or other fabric is helpful as it increases their bubble juice-holding capacity. Also, the wire can be inserted into hollow diamond braid cord and bamboo tape style yarn.
Methods[]
There are several methods that work well for creating nice hoops. Some people prefer to bend their hoops freehand (see tutorial). Some bend the hoop around a form (which could be anything circular as long as its diameter is just smaller than the diameter you want: a frying pan, a flower pot, etc.).
Tutorial - bending aluminum rod freehand[]
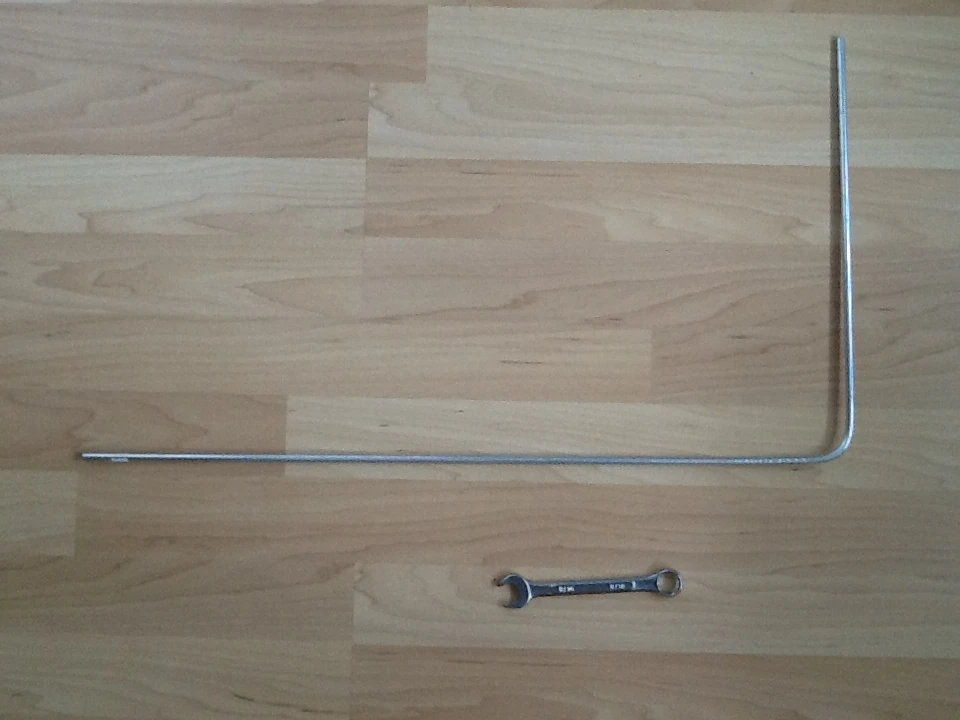
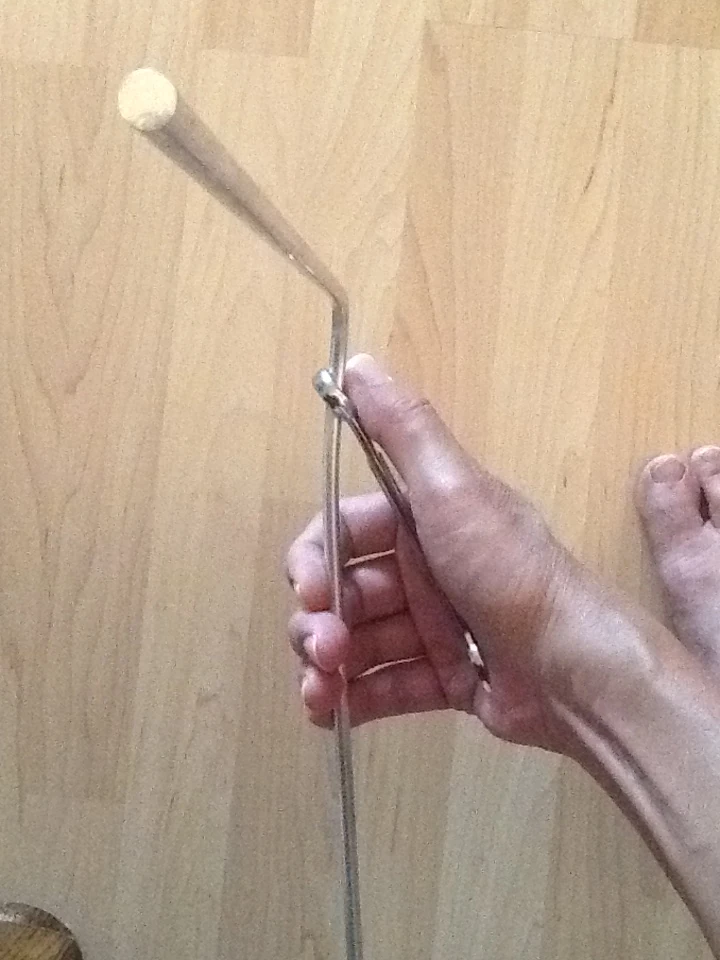
This method uses a closed-end wrench (or the handle of crescent wrench that has a cutout in its handle) and length of aluminum rod.
With some care you can bend a nice hoop from a length of aluminum rod. 1/4" rod is easily available in the U.S. and is quite inexpensive. A 36" length will typically run $3-$5. In Europe, 6 mm rod is standard (a bit thinner than the U.S. 1/4" rod). This tutorial demonstrates freehand bending using a closed-end wrench or the 'cut-out' end of a crescent wrench. (Crescent wrenches generally have a circular cut-out in the handle that works fine. 150mm/6.inc crescent wrench works fine).
MATERIALS: A closed-end wrench or crescent wrench with a hole in its handle. A length of 1/4" or 6 mm round aluminum rod. Some epoxy putty for "welding" the hoop closed. You could substitute an appropriate adhesive such as JB Weld. Twine for wrapping the hoop OR some sort of material that can be slipped over the rod such as hollow tape-style yarn or diamond braid cord whose core has been removed.
Step 1. Figure out what diameter you want the hoop to be and figure out the length of rod that it requires. The formula is πd (Pi times diameter) which is roughly 3.14 times the diameter. If you don't care about precision, the length is 3 times the diameter.
Step 2. Make a mark at desired length.

Step 3. Make a right-angle bend at the mark that you made. This creates the handle. You can actually make this bend towards the end, but it is convenient to do it at this stage. A table-vice is handy for making the right-angle bends, but you can put the rod under a heavy book or a board as a clamp to make the bend.
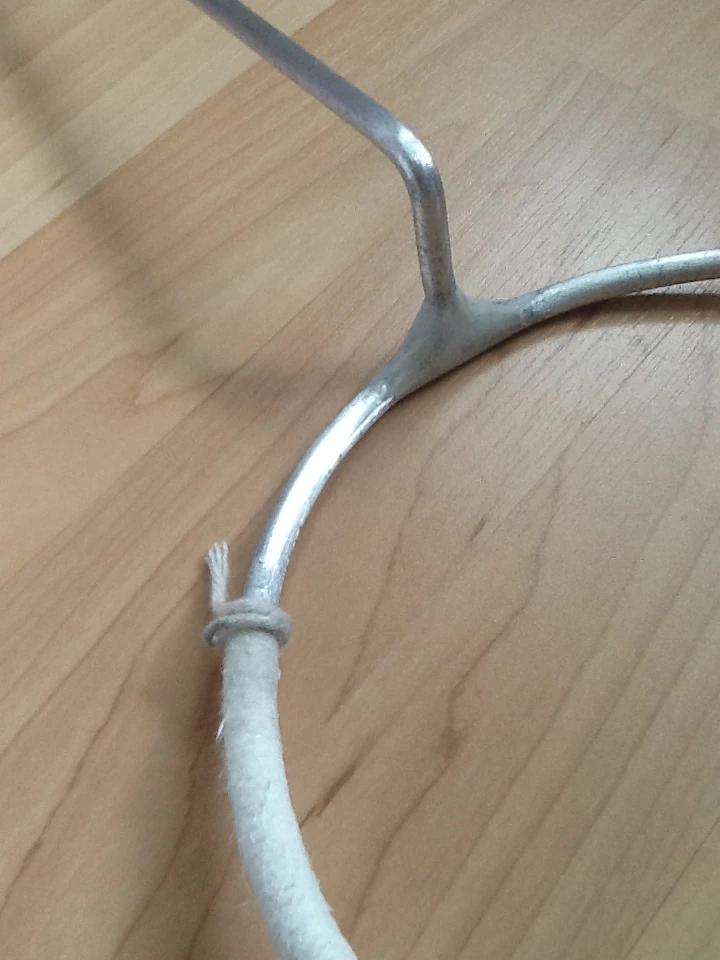
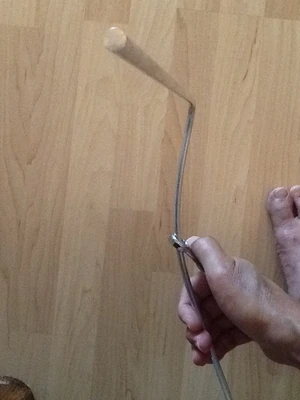
Step 4. Slip the closed-end wrench (or the crescent-wrench's cutout) on to the rod on the part of the rod that will be the hoop. Slide it near the handle.
Grip the rod and wrench as shown in the photo. Squeezing gives you a lot of leverage. The aluminum is soft. Be careful not to over bend. The metal becomes weaker the more you bend it. So, avoid the temptation to over bend then bend back into place.
Try to keep your bends in line so that the hoop does not go out of true. You can make tweaks later if it is a bit out of true.
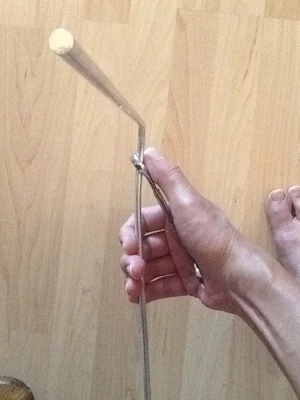
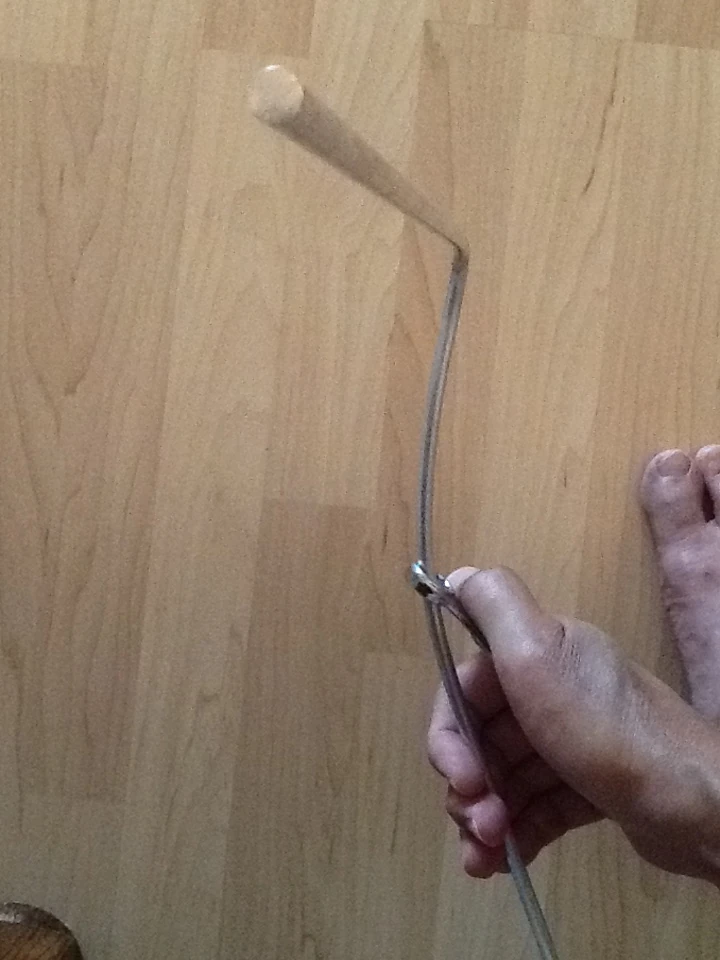
Step 5. Bend the rod very slightly. Move the wrench about 1/4" (6 or 7 mm) farther and make another slight bend.
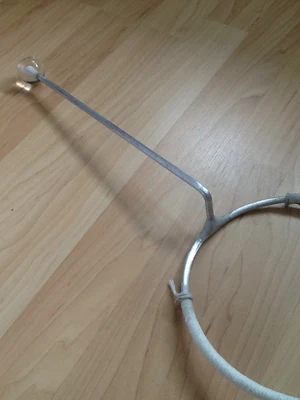
Step 6. Gradually make your way down the rod making slight bends. Keep working your way around until you meet back up at the bend in the rod. You'll need to make tiny bends here or there along the rod to keep it on path to a round shape. When you finally reach the end, make sure the there is just enough pressure to keep the ends firmly in contact with each other. The first time I did this it took me about 30-45 minutes.
Covering. If you are going to slip a material such as diamond-braid cord over the rod, now is the time to do it -- before "welding" the hoop closed.
You should now have circular hoop. There are a few steps remaining in order to "weld" the hoop closed.
Step 7. Rough up the area around the handle on the handle and hoop side and wipe it clean with isopropyl alcohol or something similar so that the adhesive will bond well. Some people use a dremel to rough up the metal. Aluminum is soft. I roughed it up using a pliers. This gives a good surface for the adhesive to bond to.
Step 8. Use the epoxy putty to "weld" the hoop closed. When it is dry, you can sand it smooth.
Step 10 (optional). You can rough up the bubble-making part of the hoop with sandpaper and spray with automotive clear coat. [EDITOR'S NOTE: I am not sure how critical this step is]
Homemade hoop being wrapped with cotton twine.
Step 9. Wrap the hoop with twine. Some people wrap it tightly others use just a little bit of twine. You can experiment with what you like.

Finish the hoop by adding a knob.
Finishing. To complete the hoop, make another right-angle bend a couple of inches above the handle. Add a knob at the end for convenient gripping. The knob shown is an acrylic sphere with a hole drilled in it. You can use any sort of knob you like.
Video Demonstration of the Method[]

Hoop Bending, Part 1.
Part 1

Hoop Bending Part 2
Part 2

Hoop Bending Part 3
Part 3
Using a Form[]


A wire-hoop after being formed around a pot with an 8-inch rim
Items such as pots, pans, fire extinguishers, bottles, and street lamps (!) can be used as forms around which to bend hoops from aluminum rods. Depending on the size of the object, you may either want to lay the object horizontally and bend around it, or lay the object on its side on top of the rod and bend around it that way. In either case, pull the rod tight while bending around the form. Pull it a bit farther than 360 degrees so that you get a nice tight fit and then make the handle bends.
"Weld" the hoop together using the method described in the tutorial in the section above.
Odds-and-Ends[]
There are many suitable coverings. Some people secure the covering only at the ends while others secure the whole length.
You can make an attractive double-handle by making a u-shaped bend in the handle.
Take inspiration from the gallery of hoops below.
DuraFix (and similar) "welding" rods can be used to complete a hoop (rather than using epoxy putty) and require only a propane or butane torch to use. They make a very strong bond. See a demonstration video: http://youtu.be/jijW310xvp4
1/2" copper tubing (water pipe) is suitable for hoop-bending.
Since uncoated aluminum can corrode, Brian Lawrence recommends a coat of lacquer or a coat of Design Masters sealer with a layer Krylon clear finish on top of that.
(Question: am wondering if Plasti-dip (found in the paint department at large building supply stores) would work as both a sealer and as a suitable cover that would hold some juice? Nancy C (talk) 22:46, October 2, 2013 (UTC))
Gallery[]
Pictures[]
")
")
")
")
")
")
Videos: Hoops-in-Use[]

Soap Bubble Hoop Work 12-26-09
Some lovely hoop work