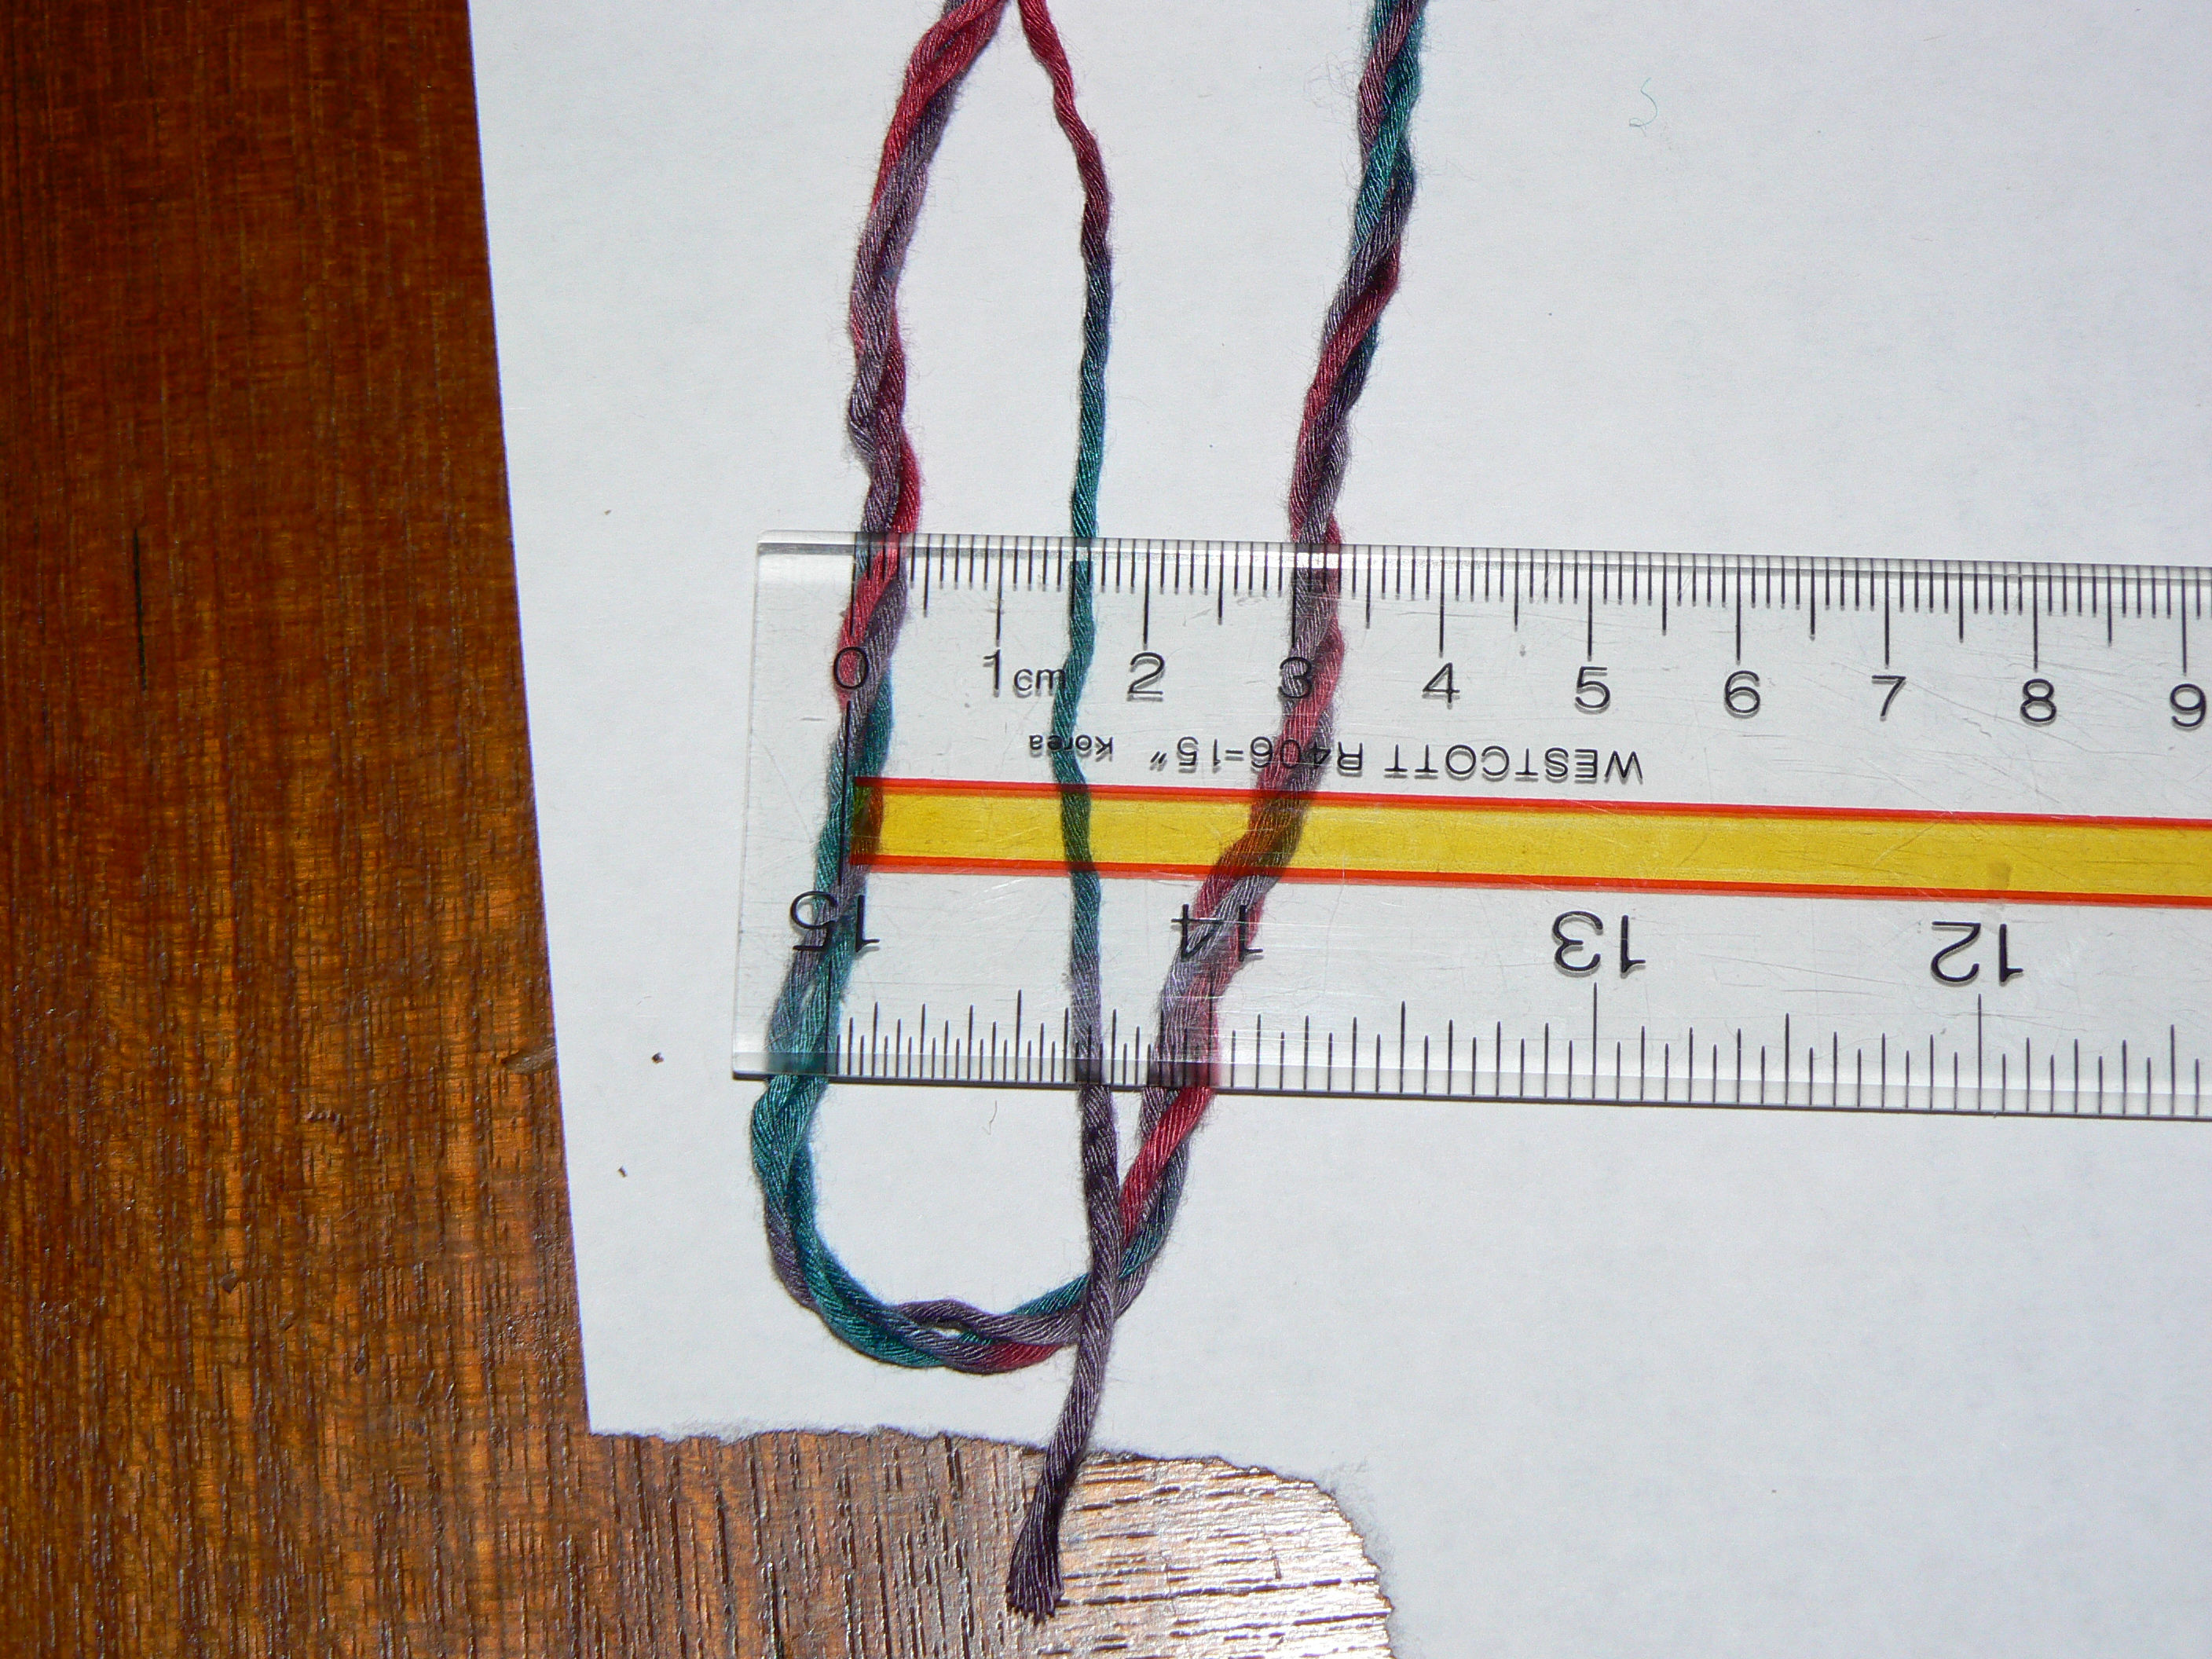
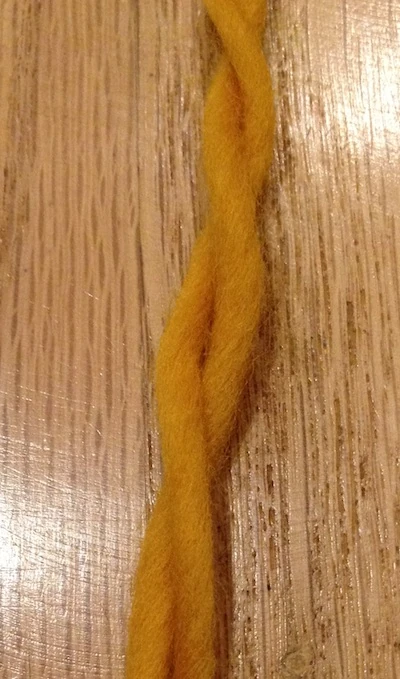
A triple-strand cord made from Bamboo yarn and a single strand of the yarn
It is often very handy to be able to make custom cord/twisted rope to use for string-based bubble wands. There are many ways of creating twisted ropes. We document two ways to make twisted cords: one method using an electric drill (or electric screwdriver or similar) and another using a contraption made from a cardboard box. Both methods use the same essential technique: the strands are twisted equally in the same direction and then allowed to spin back on themselves. This creates nicely twisted cord. The drill method is very fast, but the method using the twisting contraption takes only slightly longer and provides more consistent results since the strands are guaranteed to be twisted evenly and because it is less likely that you will create over-twisted cords.
Braided cords. In addition to the twisting and wrapping techniques demonstrated here, braiding is also an effective way to create multi-strand cords. It is some people's preferred method though many consider it impractical for making more than a few cords since it can be time-consuming to make long braided cords.
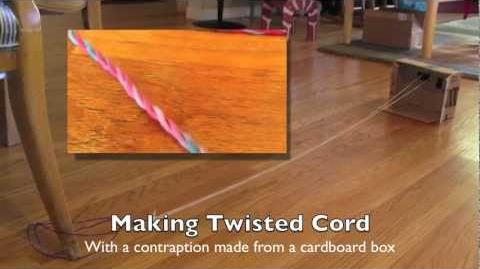
A Cord Maker Made from a Cardboard Box[]
How to make twisted cord and rope with a cardboard contraption
Video demonstrating a ropemaker made from a cardboard box
A simple effective cordmaker can be made from a cardboard box and a few pieces of wire snipped from a clothes hanger (or similarly stiff wire). See how in this video
[2012 10 02] This photo album shows a cord maker made in 5 minutes from a cardboard box. I will document it soon in greater detail
A cord-twisting contraption made from a cardboard box.
You could, of course, make a sturdier version of the contraption out of wood if you prefer.
The Drill Method[]
The method described here uses nothing but an electric drill (or screwdriver or anything that turns) fitted with a hook and a couple of hooks (which can be made by bending wire coat hangers) latched on to table or chair legs and something that swivels. If you don't have a drill or electric screwdriver and egg beater, hand mixer or even a twirling finger can be used.
It is very important not to overtwist the strands. While tightly twisted strands look very pretty, the result is much less effective for making bubbles than if the cord is relatively loosely twisted. The space between the threads and strands that make up the cord are a critical repository from which bubble juice can be readily released during bubble formation. Tightly winding the strands results in compression of the threads and strands that eliminates these spaces. Some experimentation is worthwhile as some materials may be so thirsty that you want to compress the strands a bit.
The advantage of the technique described here is that it doesn't require doubling-up of the cord or running the drill in reverse. Also, it allows you to make cords with even or odd numbers of strands. Note that everywhere where I talk about strands, you could use a looped strand -- this is handy for thicker cords of four or six or eight strands. In these cases, you make two, three, or four single strand loops of your material and hook one end of each loop on to the two hooks.
Overview[]
Measure your strands.
Tie one end of each strand to the "stationary" hook,
Tie a loop in the other end of each strand.
Run the drill to twist each strand which is then temporarily hooked on to a "tension hook" that keeps the twisted strands under tension until all strands have been twisted.
Hook the twisted strands onto a hook attached to a swivel (that is prevented from swiveling until the next step).
Allow the swivel to be reverse twisted by the torsion of the twisted strands while slowly easing the tension.
Tie of the ends of the cord to keep it from unraveling.
Key Elements[]
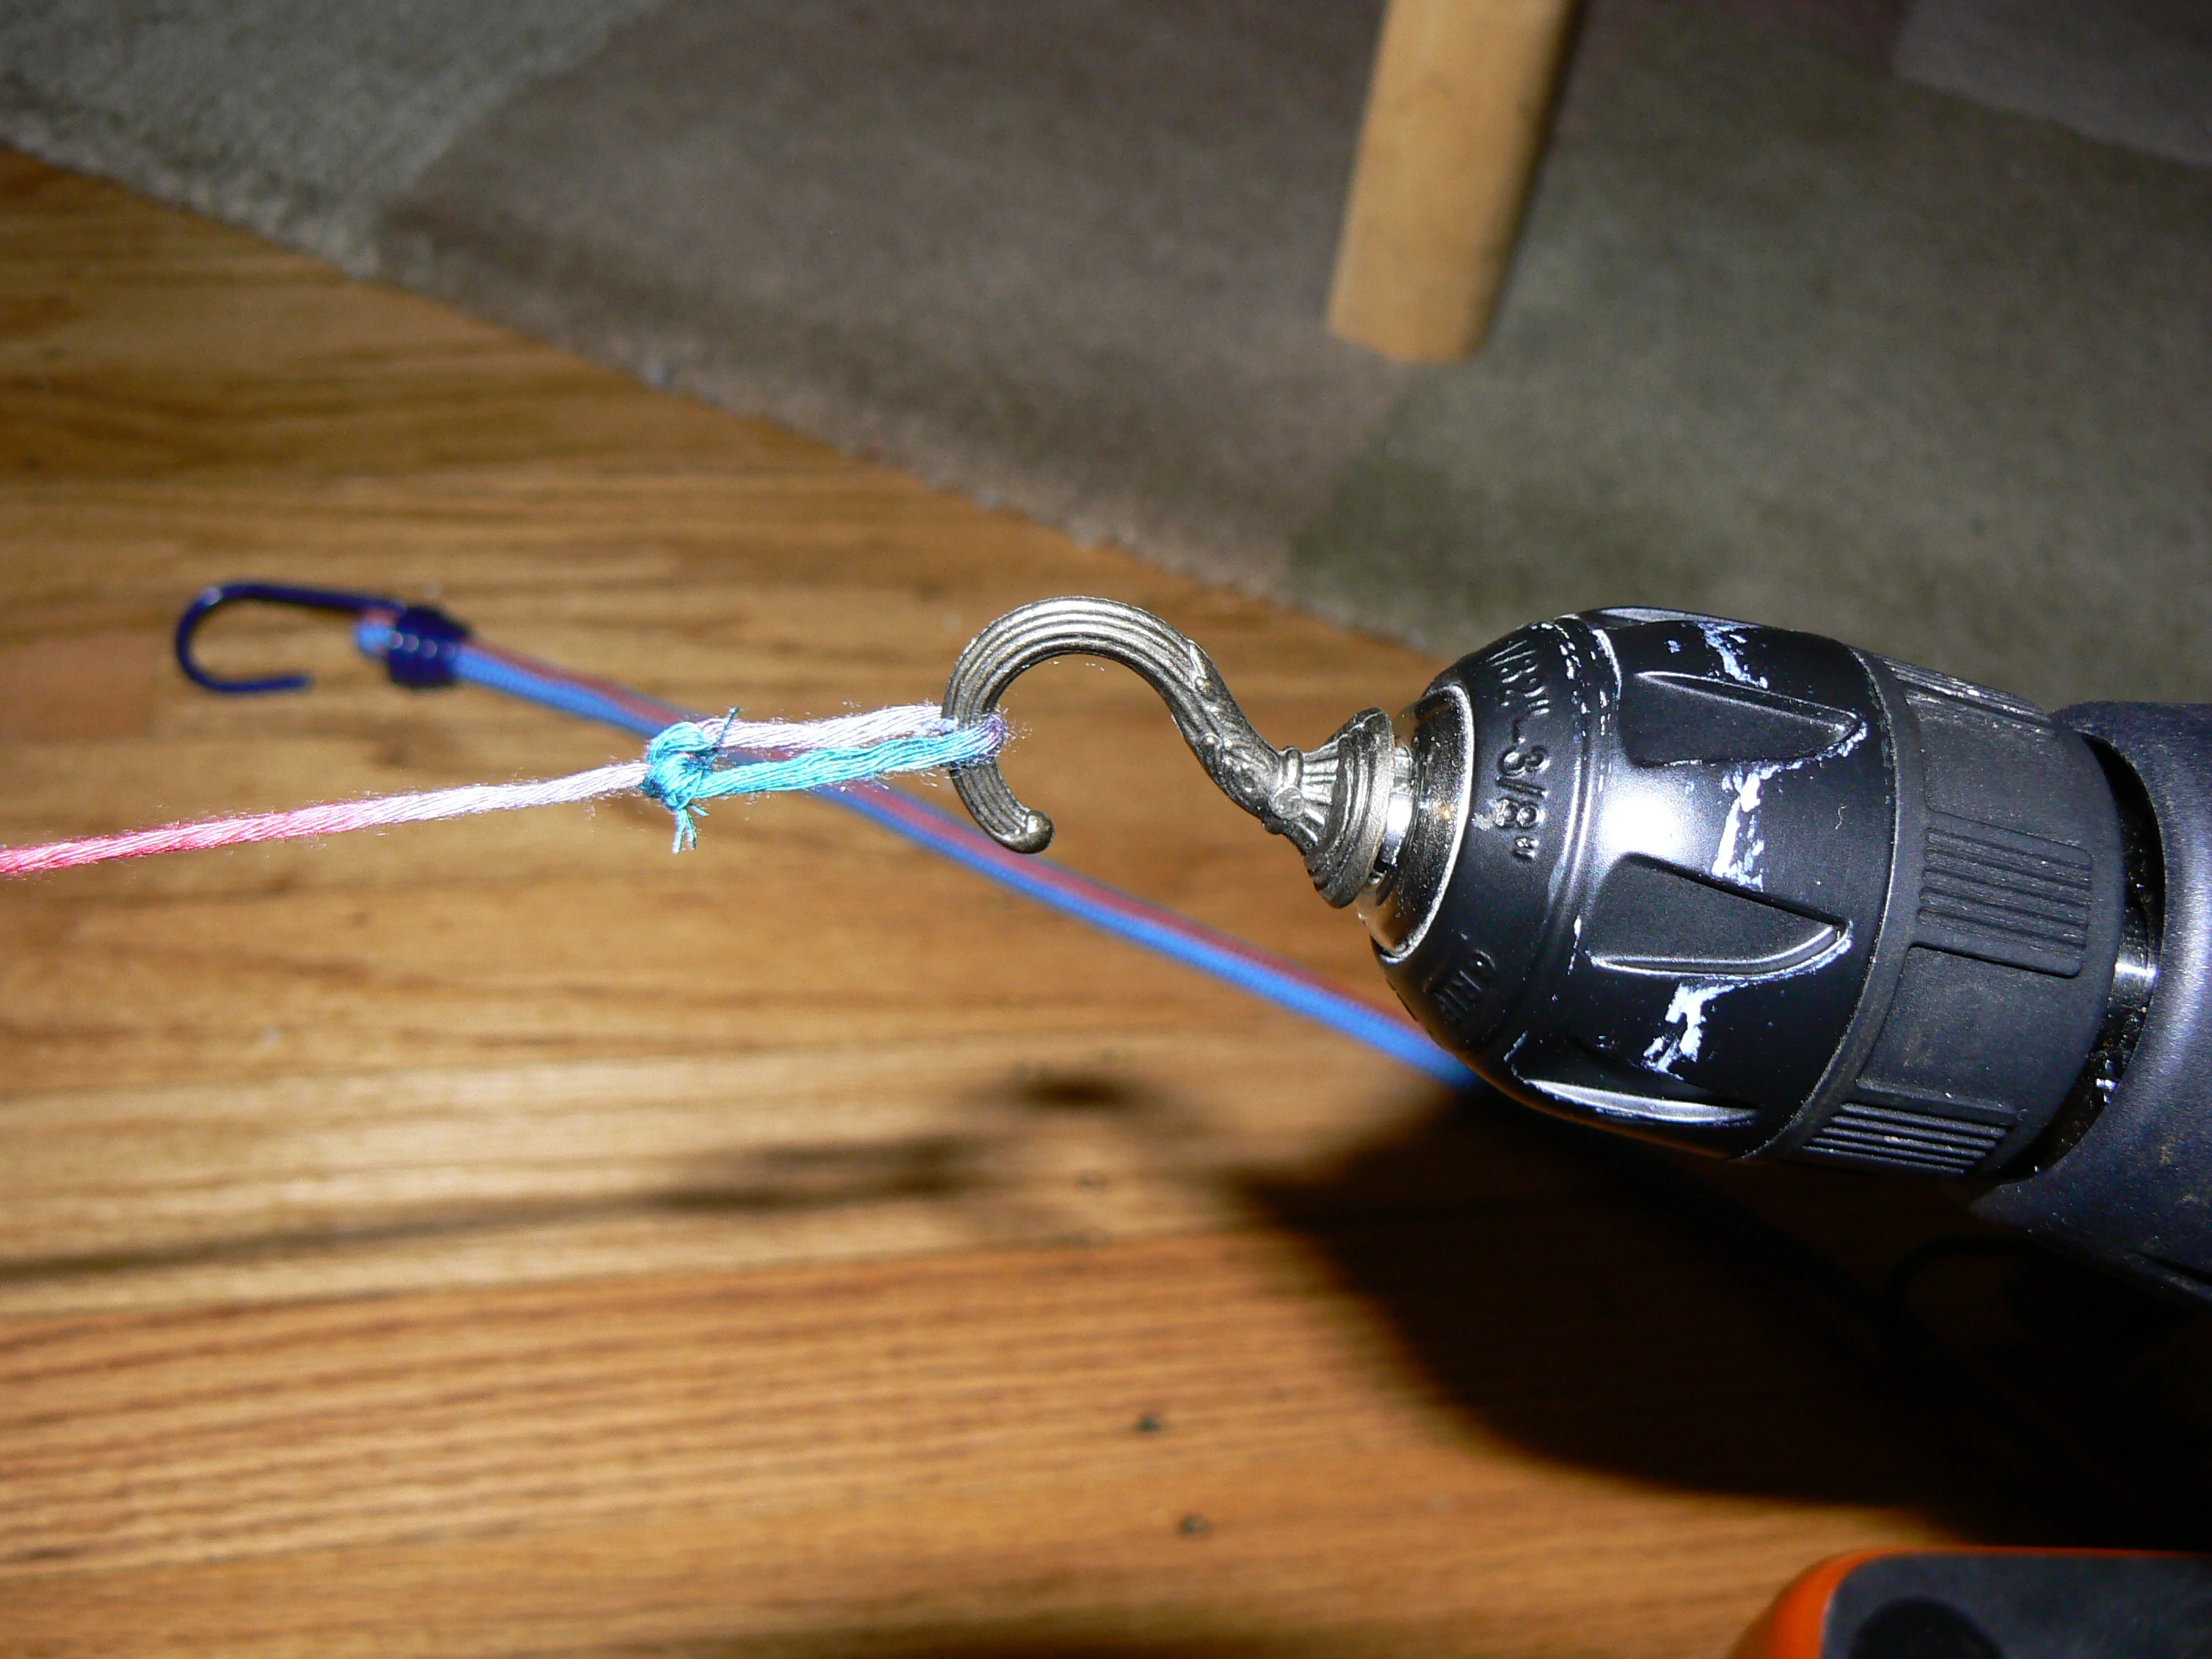
Drill fitted with a hook.
A drill fitted with a cup hook. You can also make your own hook by bending coathanger wire.
A drill (or electric screwdriver) is fitted with a hook of some sort so that each strand can be twisted by running the drill.
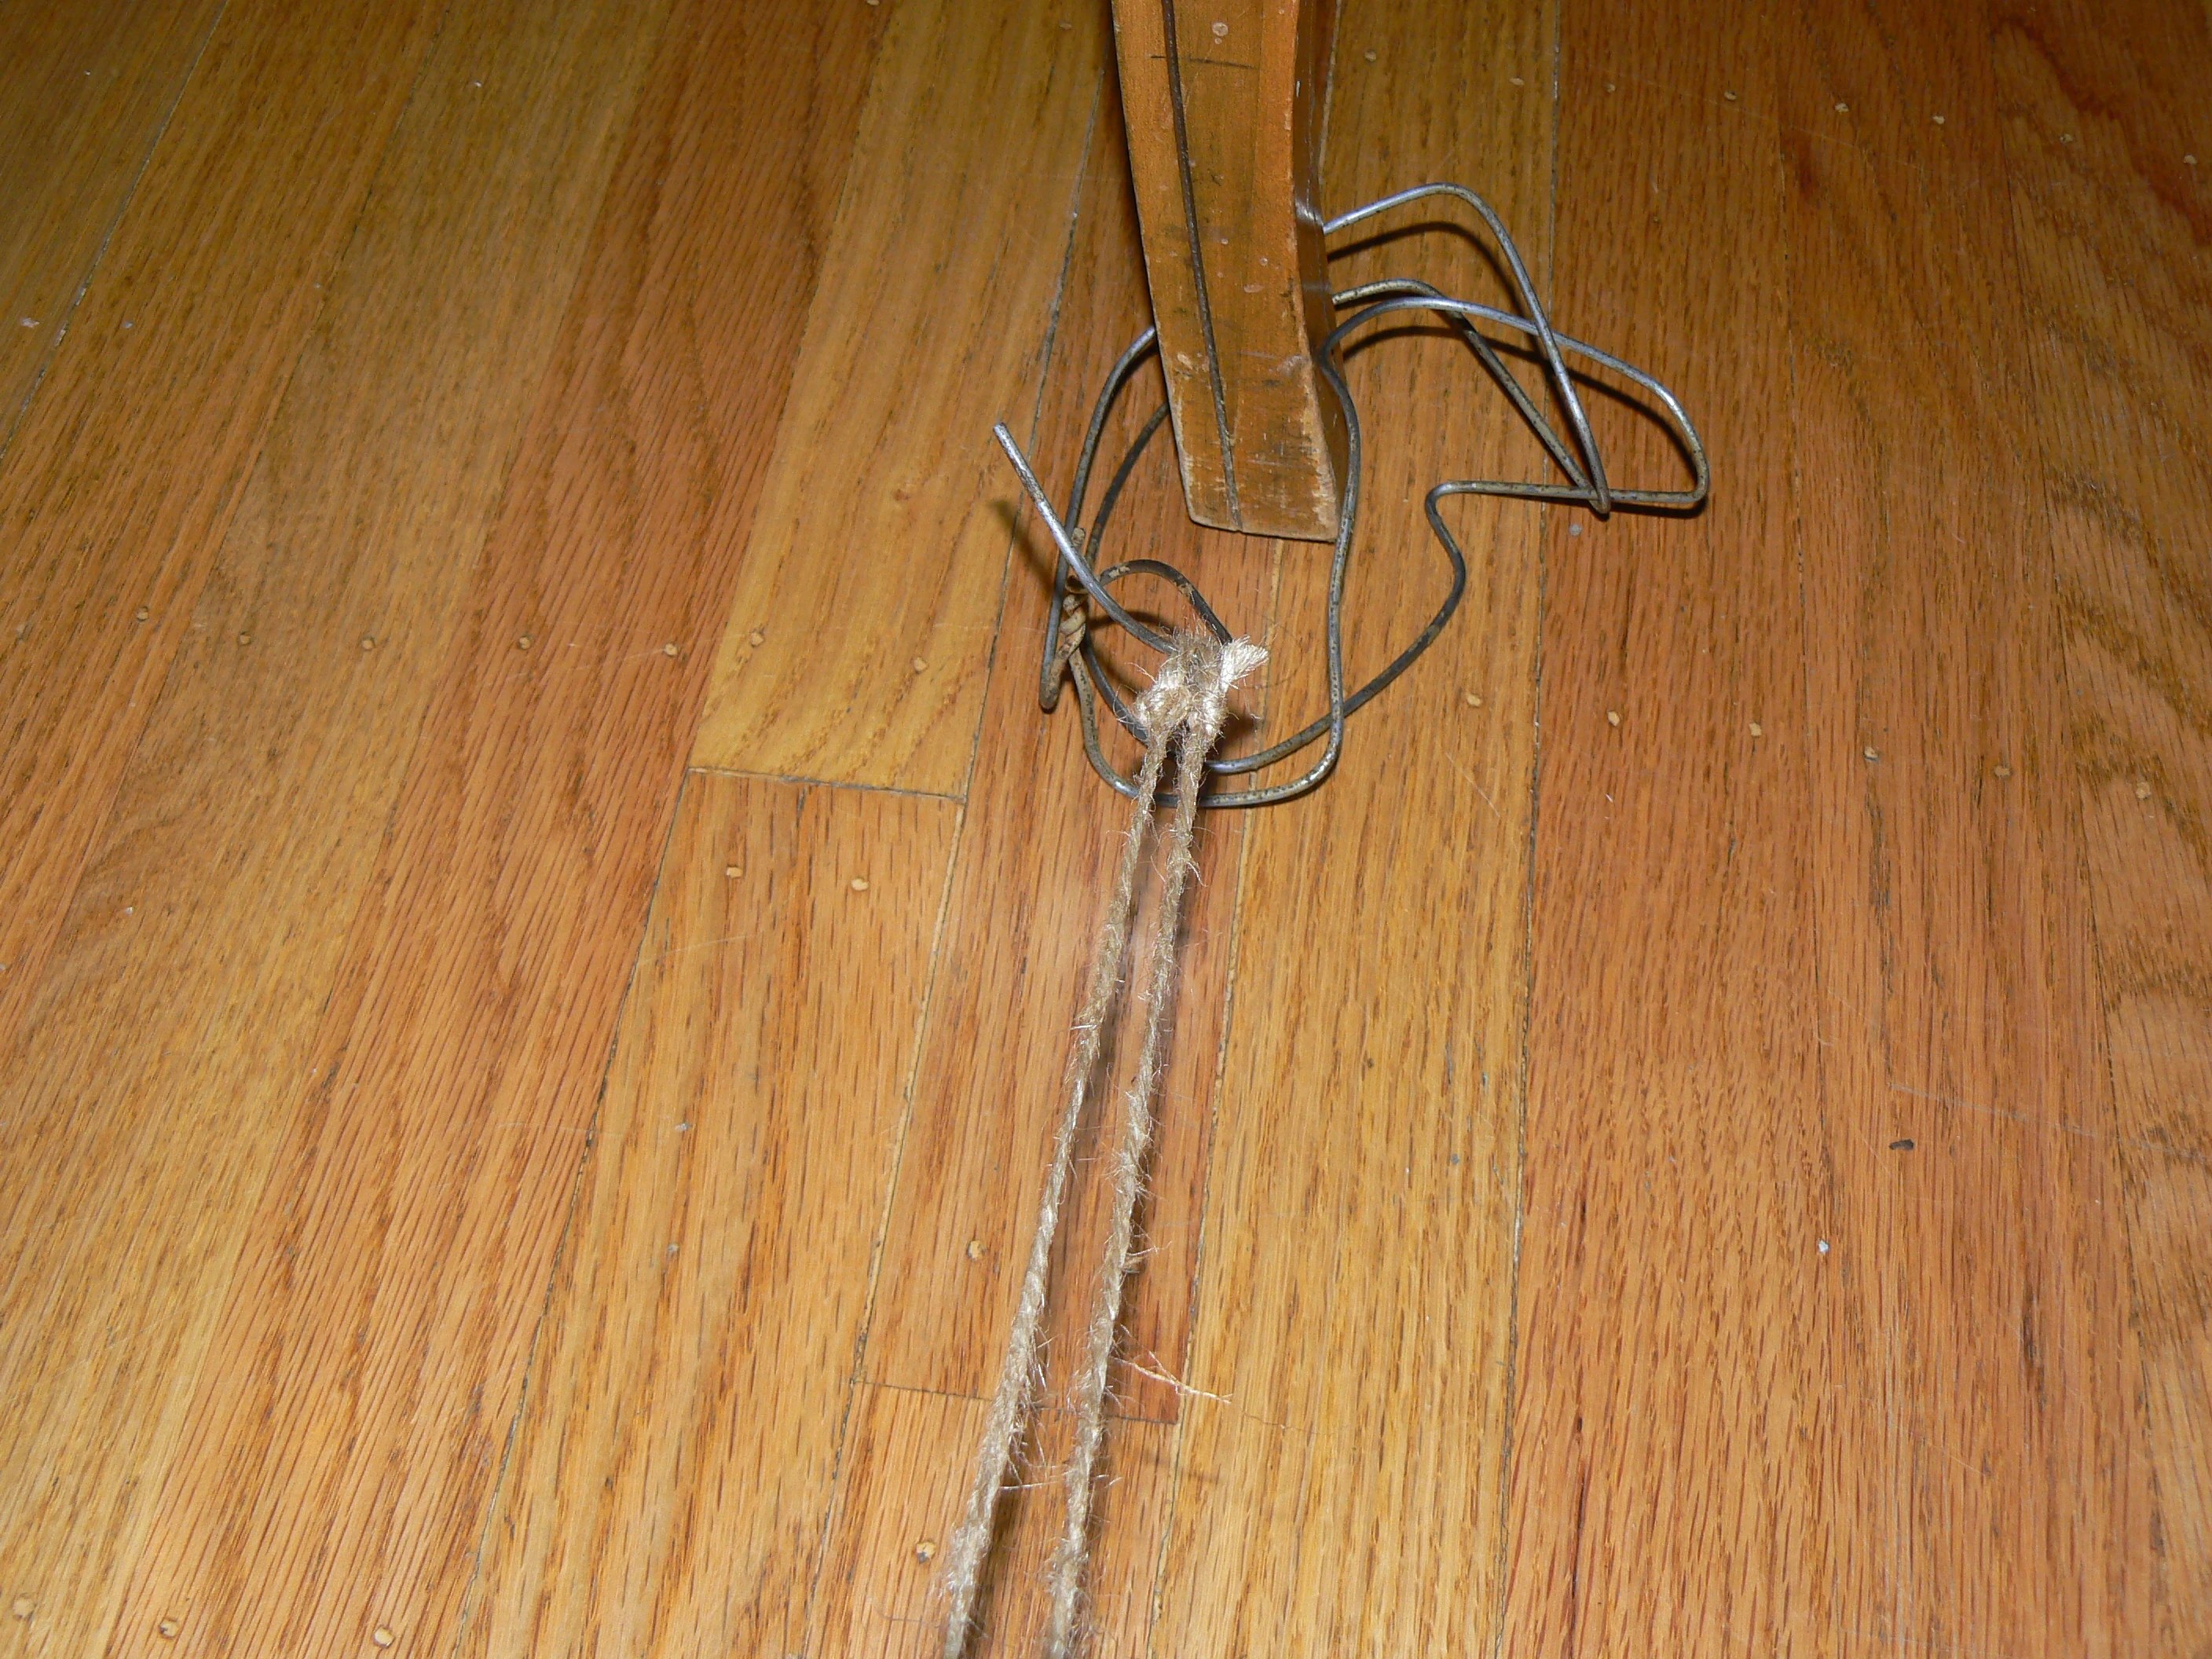
Stationary hook. One end of each strand to be twisted is tied onto a hook
Stationary Hook with two strands of jute. Attached to a chair leg
(I use a bent coat hanger) that doesn't move during the twisting. This hook needs to be attached to something that won't move when the strands are under tension. For loosely twisted cords, an arm chair is generally heavy enough. For tightly wound cords, a table leg works better.
Tension hook. After each strand is twisted, it needs to remain under
A Bungee cord used as a tension hook. The twisted strands will be hooked on to this until all the strands have been twisted.
tension. You will unhook each strand after it is twisted and hook it on to the tension hook which will be on the opposite end of the "cord run" from the fixed hook. I have used both a bent coat hanger and a bungee cord. I currently favor a bungee cord. It, too, needs to be attached to something that won't move while the cord is under tension. A table leg or the leg of a chair that isn't too lightweight will both work as anchors for the tension hook.
Swivel. After the strands are twisted, they are unhooked from the tension
A homemade hook attached to a swivel is used in the final stage. You can use any sort of swivel that doesn't offer much resistance to twisting.
hook (while keeping them under tension) and hooked on to a swivel that has little friction and the tension is slowly released allowing the group of strands to twist together. Video.
Finishing. The cord is finished by tying off, taping or whipping each end to keep the cord from unraveling. Depending on the material used and the evenness of the twisting, the cord may initially have a tendency to twist on itself. This tendency is easily remedied but the remedy that works may depend on why the cord is twisting.
Equipment []
Stationary hook. You can use a bent coat hanger or an s-hook tied to a chair--anything to which you can hook one end of the strands you will be working with). Tension hook. You can use a bent coat hanger or a bungee cord--anything that you can hook onto a table or chair leg that will keep the strands under tension after being twisted and which won't itself twist. Electric drill or screwdriver. If you don't have a drill, you could use an egg beater or hand mixer. You can also put the loop on your finger and twirl it around to twist the strands.
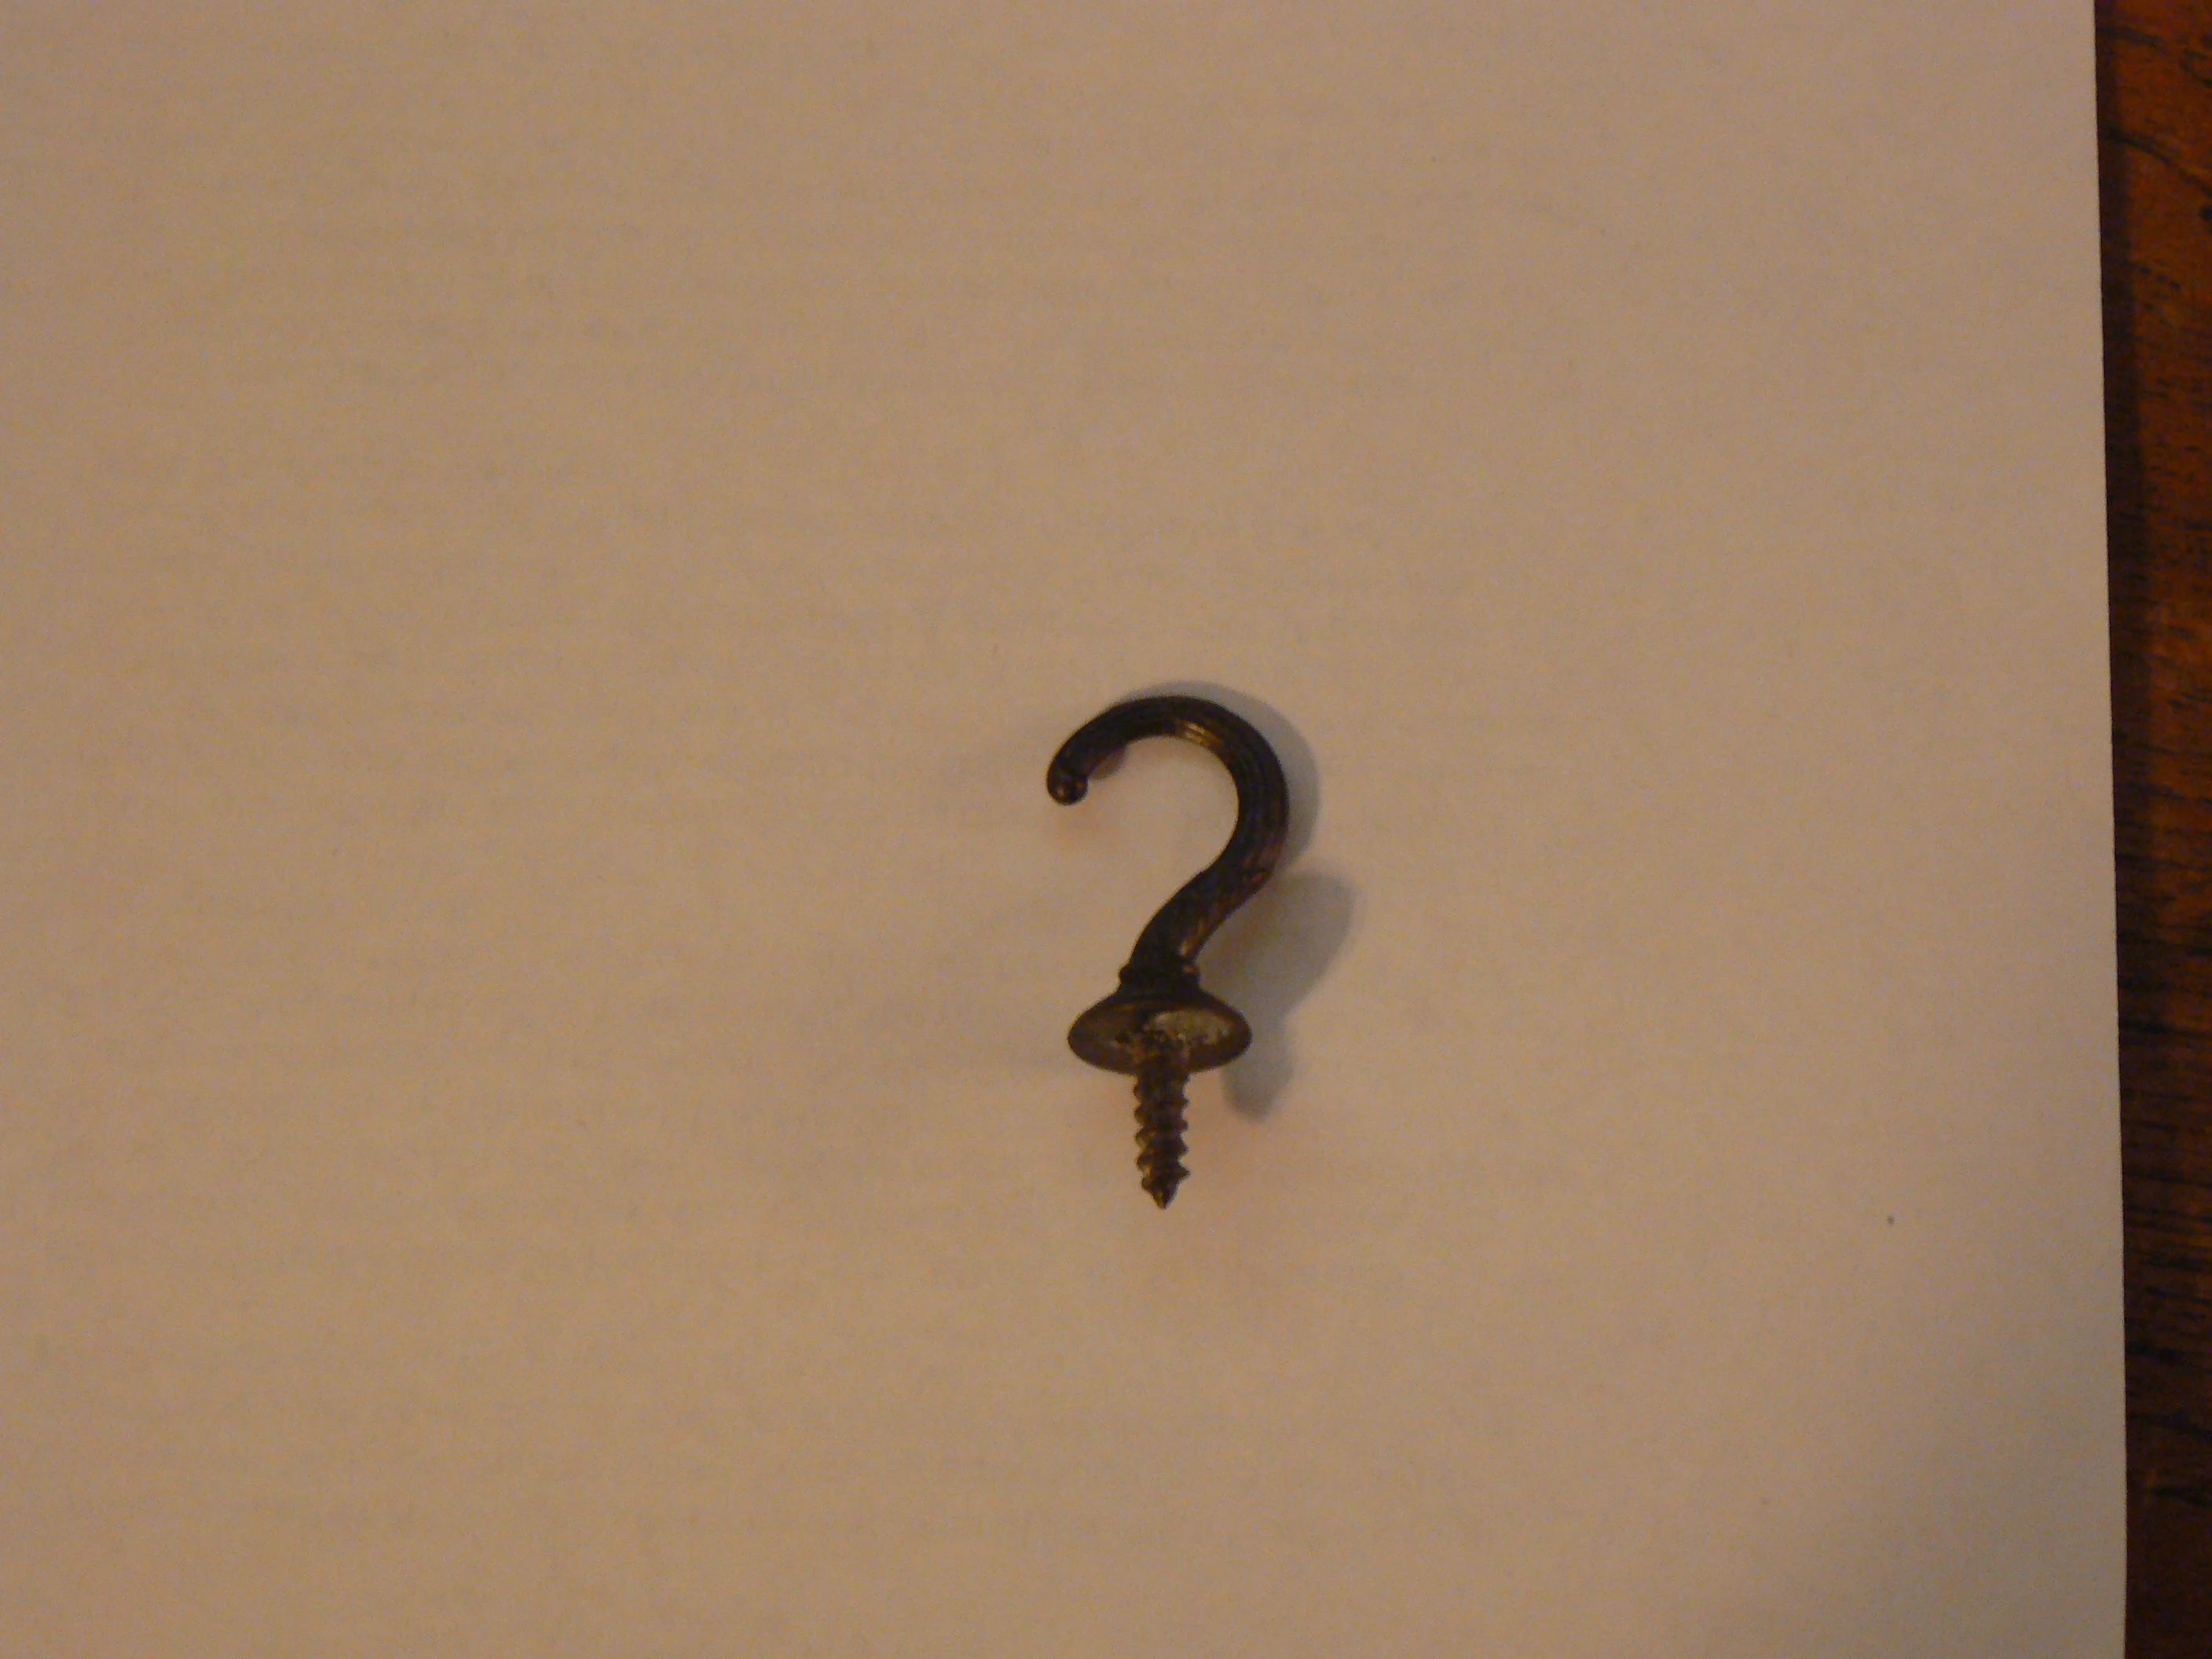
Hook for the drill.
A cup hook.
A hook that you can attach to the drill. I use a "cup hook" like the one shown below but you could make one from a piece of coathanger wire or use anything that can be secured appropriately. Something to twist. Usually string, thread or yarn.
Scissors. For cutting the strands to size. A swivel. I use a fishing swivel, but you could use anything that swivels that doesn't offer much resistance. A swivel hook, swivel keyring or swivel eye snap hook can work. Timer (optional). This is very useful for timing how long each strand is twisted. This makes it easier to fine-tune how tightly wound the cord is, and it makes it possible to reproduce your results.
Step-by-Step Instructions[]
How to make rope and twisted cord
Demonstration of this rope-making technique
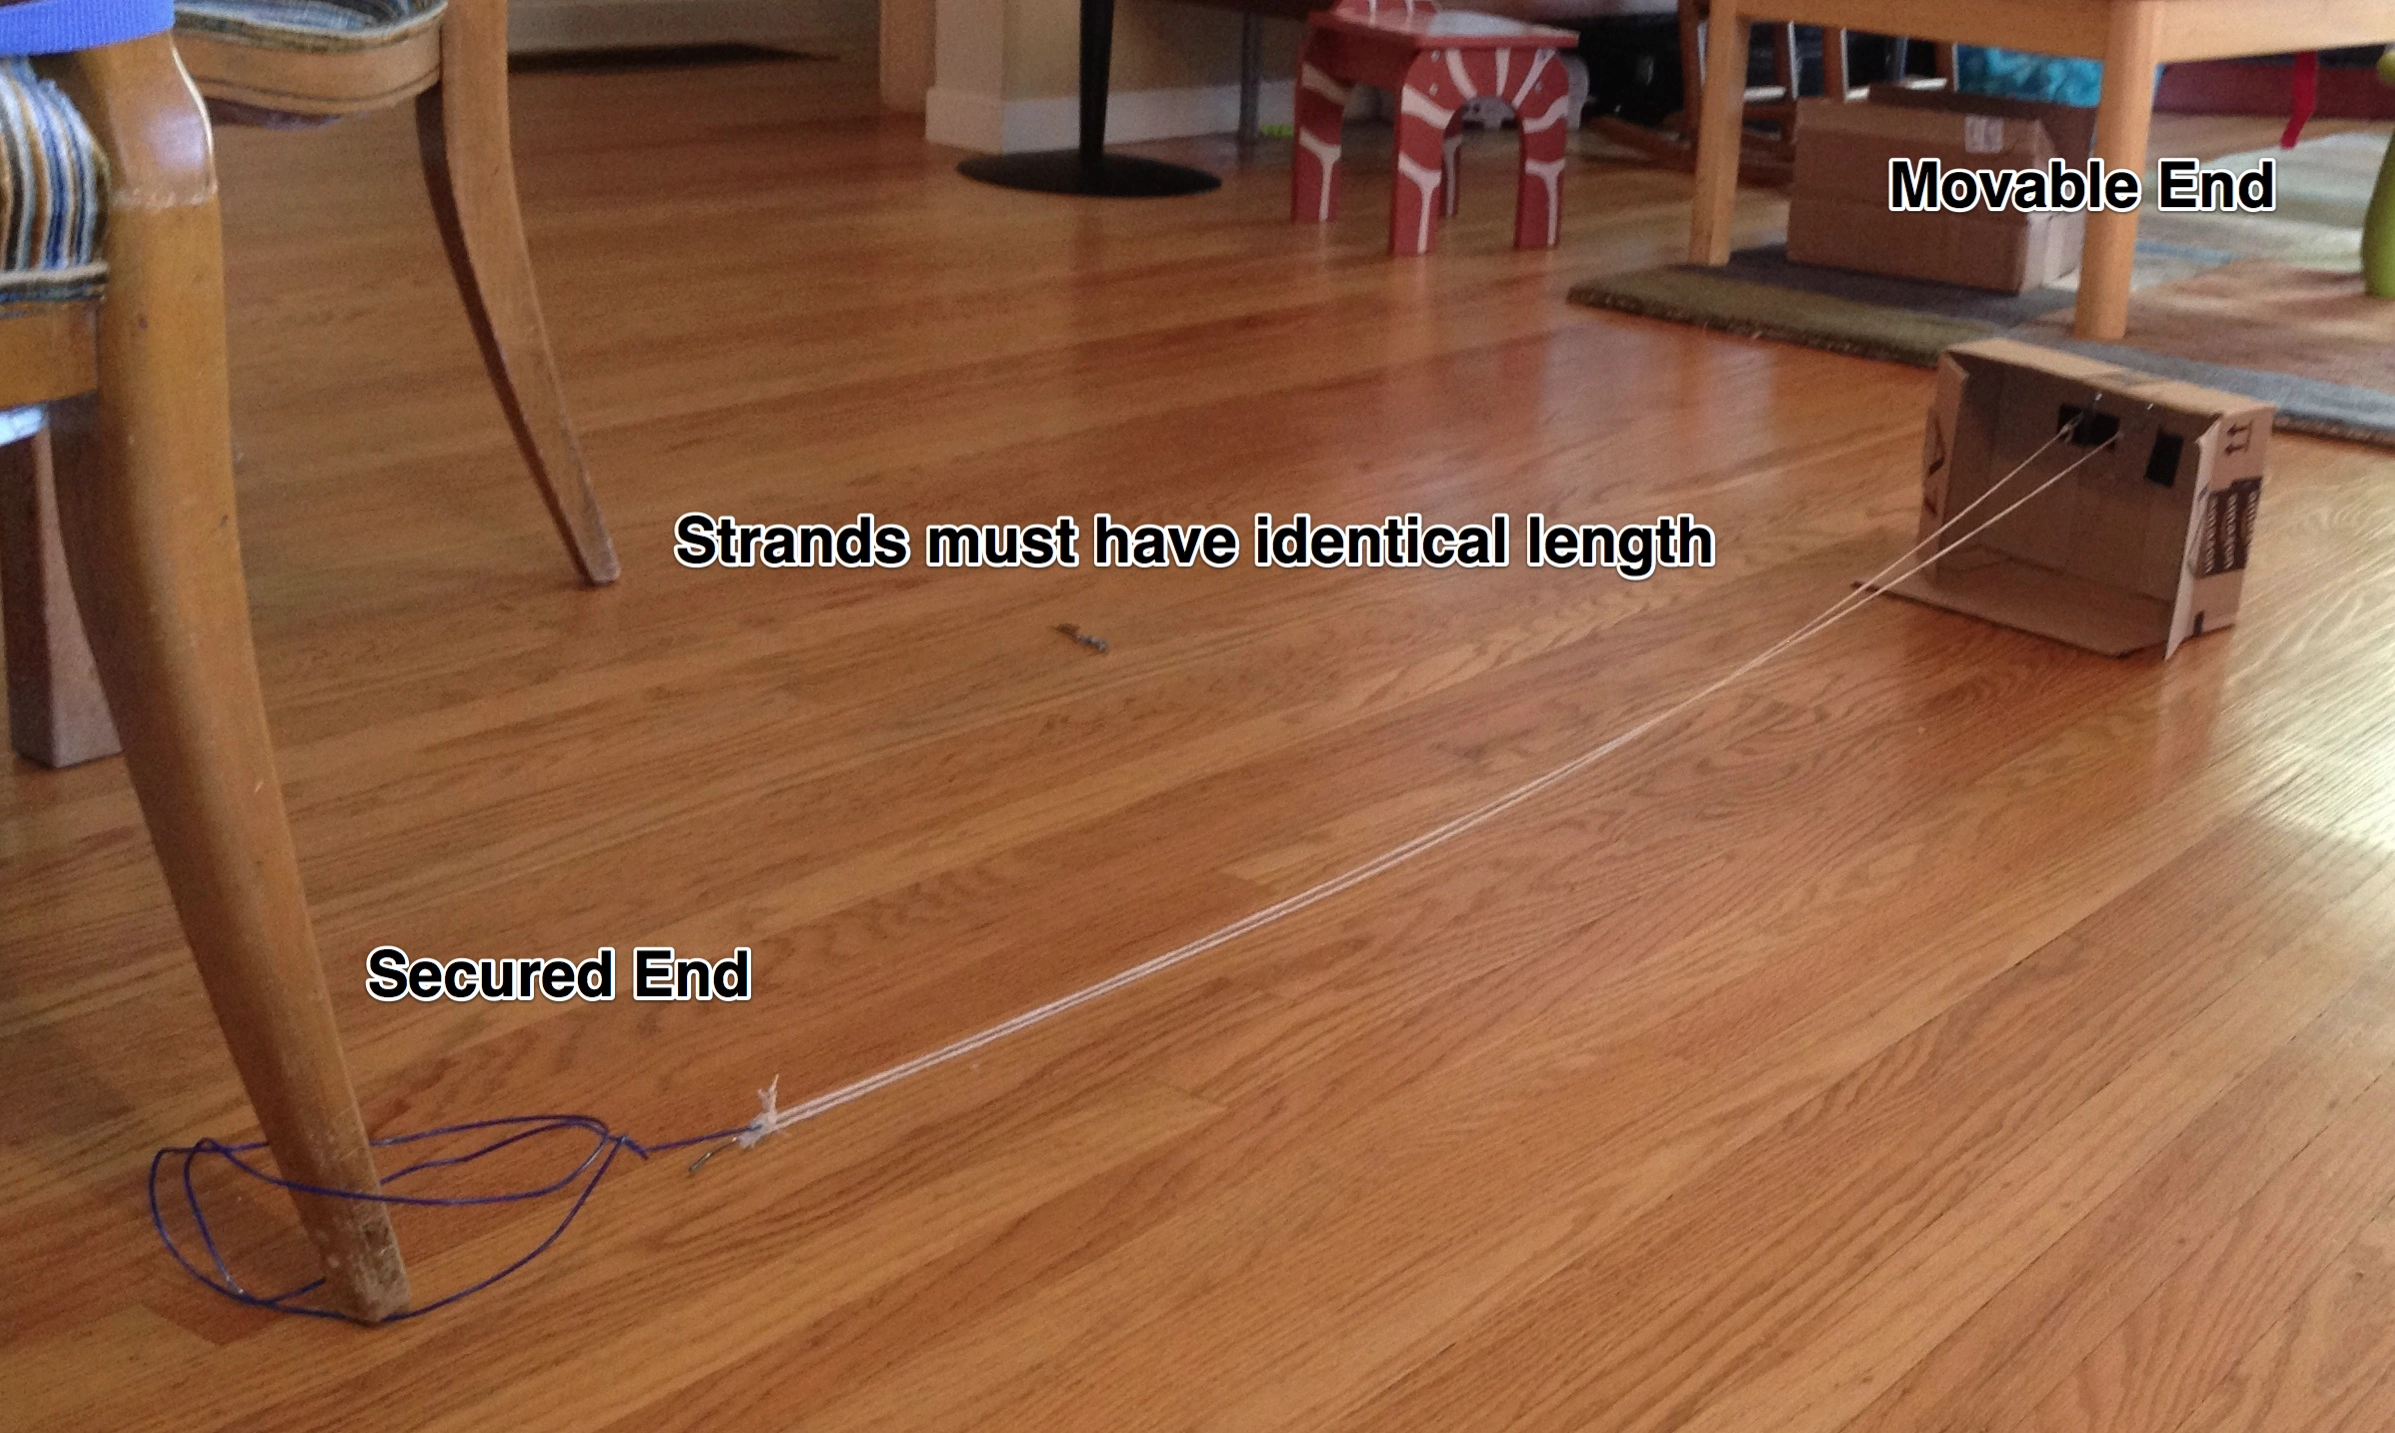
Attach the stationary hook to something that won't move when the strands are under tension.
Attach the tension hook to something that won't move when the strands are under tension. The distance between the two hooks should be slightly less than the length of your strands.
Cut your strands to length. When creating lightly twisted cords, the length might only decrease 1 to 3%. The advantage of a bungee cord as the tension hook is that you have some leeway in case you twist the cord more than you intended. Cut your strands to as close the same length as possible.
Tie one end of each strand to the stationary hook. (If you are using loops of your material rather than a single strand, hook the knotted end of the loop to the stationary hook.
Tie a loop in the other end of the strands. (If you are using a loop, skip this step). The strands are going to be hooked and unhooked from the drill and the tension hook. I tie a bowline knot at each cord's end. You could also tie the strands to rings or hooks that you hook onto the the other hooks. While I use bowlines, they are a little tricky to tie so that the the resulting strands have the same length.
Lay out the strands. Stretch the strands out and arrange them so that their free ends are within reach of the tension hook. Make sure that they aren't twisted around one another.
Wind the strands. Hook one strand on to the drill. Wind the drill clockwise until you first notice that you need to move the drill a bit closer to the stationary hook. Keeping the strand under tension, unhook it from the drill's hook and hook it onto the tension hook. Note: if you are using a bungee cord as a tension hook, make sure to put a book down on top of the hook before letting go -- otherwise the strand might untwist. Repeat this until each strand has been wound. If you are using a timer, start the timer when you start running the drill and top it when you stop the drill. Run the drill for the same amount of time for each strand.
Swivel.
The twisted strands have been hooked on to a hook attached to a swivel. They are held in place and then the swivel is allowed to spin. See the video.
Once all the strands have been twisted, unhook them from the tension hook and hook them onto a hook attached to the swivel. Make sure that you do not let the swivel turn at this stage. Once all the strands are hooked on to the swivel, keep it under tension and let it swivel on its own. Gradually release tension until the cord stops twisting on itself. Video.
Tie off the ends. The end of the cord need to be protected from unraveling. You can tie of the ends or wrap the end with duct tape or (if you are super cool) you can whip the ends (do a Google search if, like me, you have no idea what whipping means in this context)
Finishing. If the cord has a tendency to twist on itself, soak the cord in water and dish soap (which is also a good idea in order to remove any chemicals used in the materials' manufacture that may be problematic for bubbling. Wring the cord out. Stretch it out and keep it under tension. Hold the cord by one end and let the other end dangle. Pinch the upper end of the cord between your thumb and a finger and run it down the length of the cord. You may want to stretch, dangle and pinch the cord a few times. Now, bring the ends of the cord together and see if it twists on itself. If it does, twist one end of the cord clockwise a few times. Notice whether this reduces or increases the tendency to twist on itself. If it reduces the tendency, then keep twisting clockwise until the tendency is removed. If it increased the tendency to twist on itself the end counter-clockwise until it stops twisting on itself.
Tips & Tricks[]
Untwisting. If the technique described in the Finishing section above does not remove the tendency to twist, put a little weight (nothing heavy, just enough to keep the cord under a little bit of tension) at one end and hang it out of a window, from a bridge or whatever is high enough to let the full cord hang free. This will let the cord find its own "equilibrium" state. It will twist to both directions until it's relaxed. Then pull at it a little bit and let it relax again. Repeat this procedure with the wet cord. Finally when binding the cord to a loop take out any left-over tendency for twisting.
Measuring the RPM of your drill. If like me you want to know how many twists per inch you are giving the cord, you need to know the RPM of your drill. If you have some sort of software that will let you see an audio waveform and a way to record audio to your computer, use this technique. Attach something to the shank of your drill that runs perpindicular to the shaft. You want something that is stiff but not too stiff. A wire twist tie or not-too-stiff wire or a paper clip can work. Now, start recording audio through a microphone, run the drill so that the stiff thing that you attached to the drill lightly hits the microphone once every revolution of the drill. Run the drill for about 20 seconds. Now, open the audio file that you recorded and count the number of spikes that occur in 20 seconds and multiply by 3. That is your RPM! You can now count twists by measuring the number of seconds that the drill is run.
Using Loops Instead of Strands. If you are making a cord/rope made up of even numbers of strands where the number of strands if 4 or more, you can cut the strands to slightly more than twice the length of the finished cord and tie the ends together to make a large loop that is slightly longer than the intended cord. You simply loop the knot-end of the loop around the stationary hook. This is a bit quicker than using individual strands. This is very handy if you are using very thin material and want to use many strands.
Using Your Finger Instead of a Drill. If you don't have a drill or just prefer not to use one, you can do the twisting by hand as shown in this video.
Simple Hand Wrapping Technique[]
Simple Cord Wrapping Technique
This simple technique is useful for quickly creating a two or three-strand cord. To create a two-strand cord:
Cut two strands to be slightly longer than your desired finished length.
Tie both ends to a split ring.
Secure the split ring. I use the simple holder made from bent coathanger as shown in the other videos to hold the split ring.
One strand will be the center strand and will not be twisted or wrapped. Hold it in one hand.
Hold the other strand in your other hand.
Pull them so that they are not quite taut.
Wrap the outer strand around the center by bringing it around the center strand.
Continue until the full length of the center has been wrapped.
Pull each cord gently to remove any slack (both cords need to be the same length with no slack).
Tie off the unsecured end to keep the cord from unraveling.
The result is a lightly wrapped cord. You can repeat this process to create multi-strand cords. You can also tie three strands to the split ring and wrap to around the center strand.
More Information[]
This page needs:
A demonstration video showing how to use your finger to twist the strands


